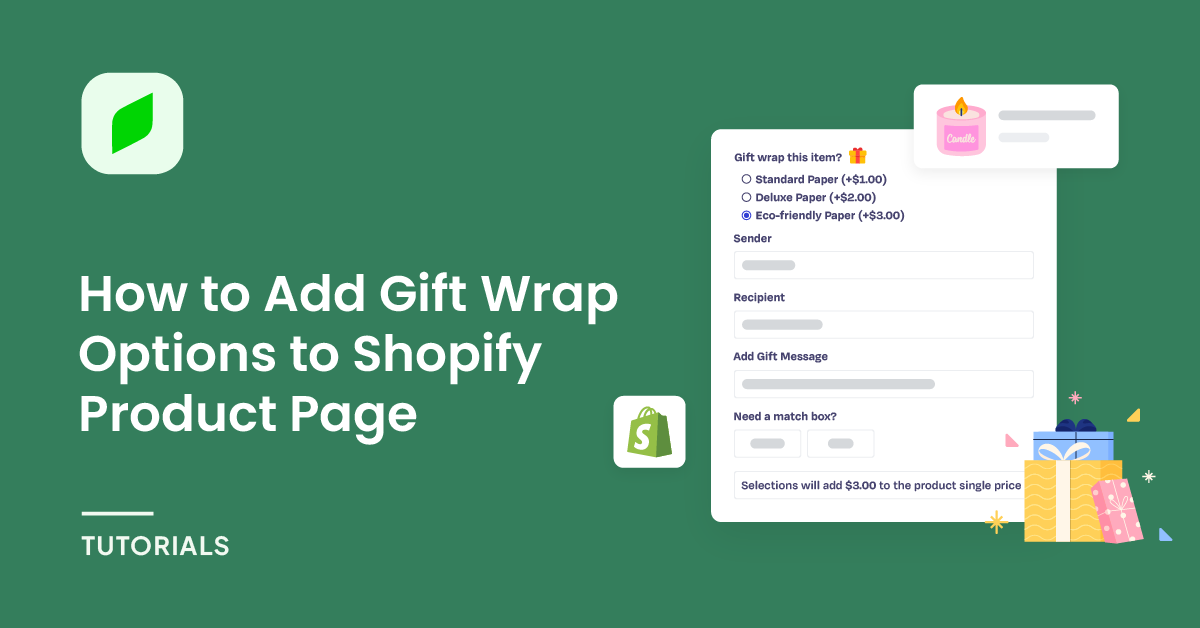
Offering a gift wrap option on your Shopify store can significantly enhance the shopping convenience for your customers, especially during festive seasons and special occasions. Professionally wrapped gifts can transform the gift-giving experience immensely, making it more memorable and delightful. It’s a small touch that can make a big difference in customer satisfaction.
Adding gift wrap options to a Shopify product page involves several steps. Here’s a comprehensive guide to help you do that.
Table of Contents
Introduce to EXPO – Extra Product Options for Shopify
EXPO is an ultimate app for creating customizable products and dynamic variant options. EXPO empowers users to add infinite product options to their product pages in bulk, making it easier than ever to cater to their customers’ unique needs and preferences.
Features
Infinite Product Options
EXPO allows you to add an unlimited number of product options, ensuring your customers can personalize their purchases to their exact specifications. Whether it’s buttons, checkboxes, color/image swatches, file uploaders, or date/time pickers, EXPO has you covered.
Customizable Fields
Provide your customers with the ability to create truly unique products by offering unlimited options and custom fields. This level of personalization can significantly enhance customer satisfaction and drive repeat purchases.
Dynamic Variant Options
EXPO enables you to automatically expand next options based on customer selections, creating a seamless and intuitive shopping experience. This dynamic functionality helps guide customers through the customization process effortlessly.
Extra Fees and Discounts
With EXPO, you can add extra fees or discounts based on your specific conditions and selected products. This flexibility allows you to tailor pricing strategies to maximize revenue and customer satisfaction.
Bulk Assignment of Options
Easily assign option sets to hand-picked products or entire groups of products, streamlining the process of adding new variants and customization options across your store.
How to Add Gift Wrap Options to Shopify Product Page
Step 1: Create a Gift Wrap Option Set
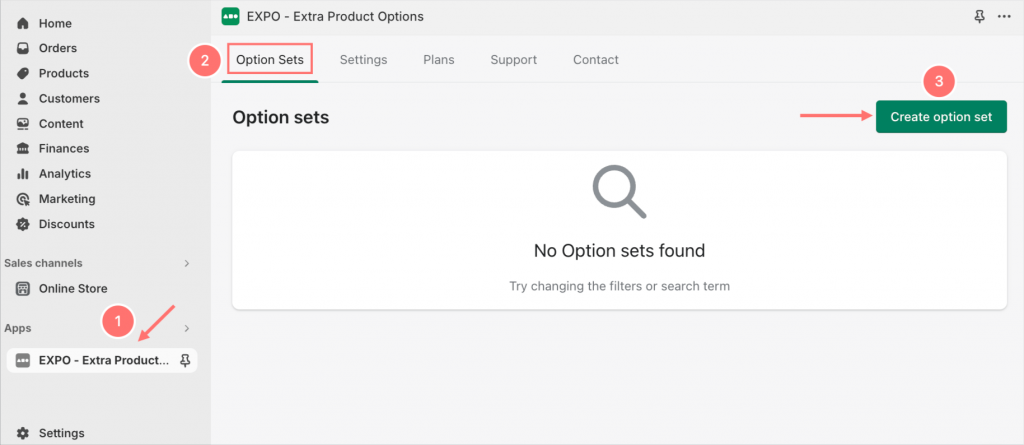
From your Shopify admin panel, navigate to Apps > EXPO, in Option Sets tab, Click Create option set.
Step 2: Set Up and Add Packaging Option Types
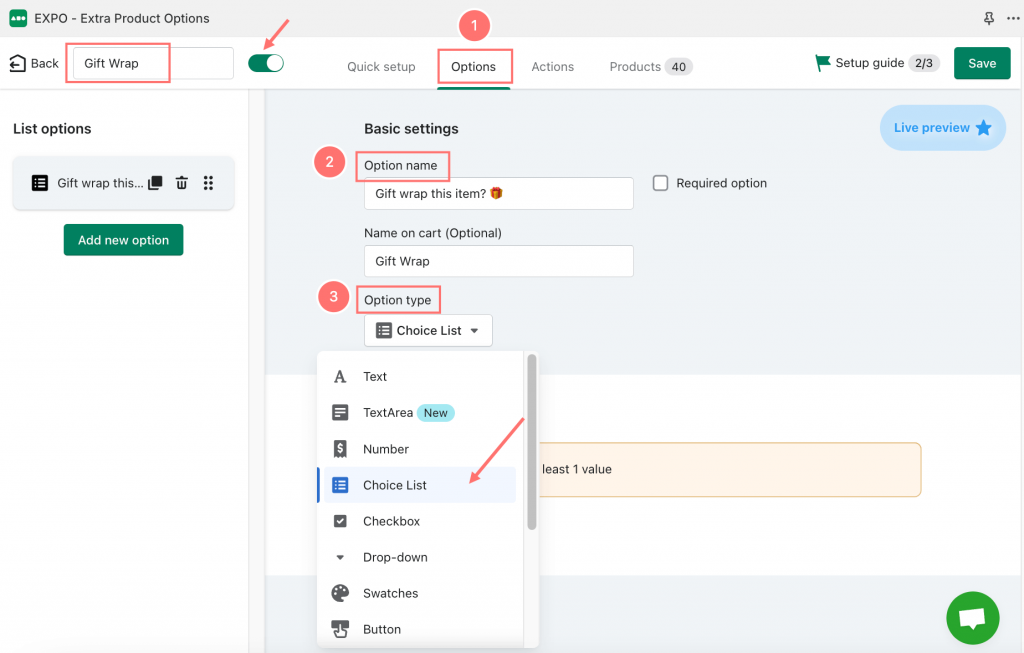
Then, you can rename the sample option set in the field on the top left to distinguish it from other option sets. In the Options tab, first we need to go through several Basic settings that you can configure to tailor the option set to your needs such as:
- Option name: Give it a descriptive name that reflects the types of options you are adding (e.g Gift Wrap, Product Wrap,…)
- Option type:
- Button: Add buttons for selections,
- Checkbox: Include checkboxes for multiple choices,
- Color/Image Swatches: Use swatches for color or image selections.
- File Uploader: Allow customers to upload files (e.g., for personalized products).
- Date/Time Picker: Add date and time pickers for scheduling or delivery options.
- And many more!
For wrapping services, the option type that best fits as a product option is Choice list.
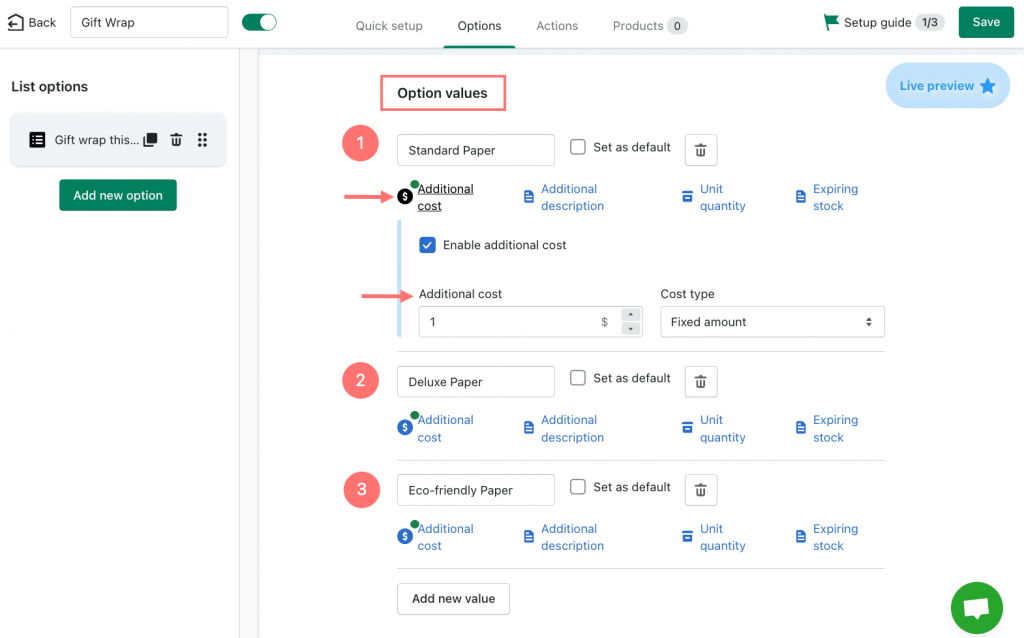
As scrolling down to the Option values section, consider the types of package variants you want to offer your customers with this wrapping service.
For the convenience and suitability for various occasions that customers want to use the gift wrapping service, I will divide it into 3 types as follows: Standard paper, Deluxe paper, and Eco-friendly paper. By clicking Add new value, you can add as many options as you like.
Depending on each type of wrapping paper, there will be different prices. To display the prices and inform customers, we can customize it by adding Additional costs. Then, tick the checkbox to enable additional costs and enter the desired price in the blank field below.
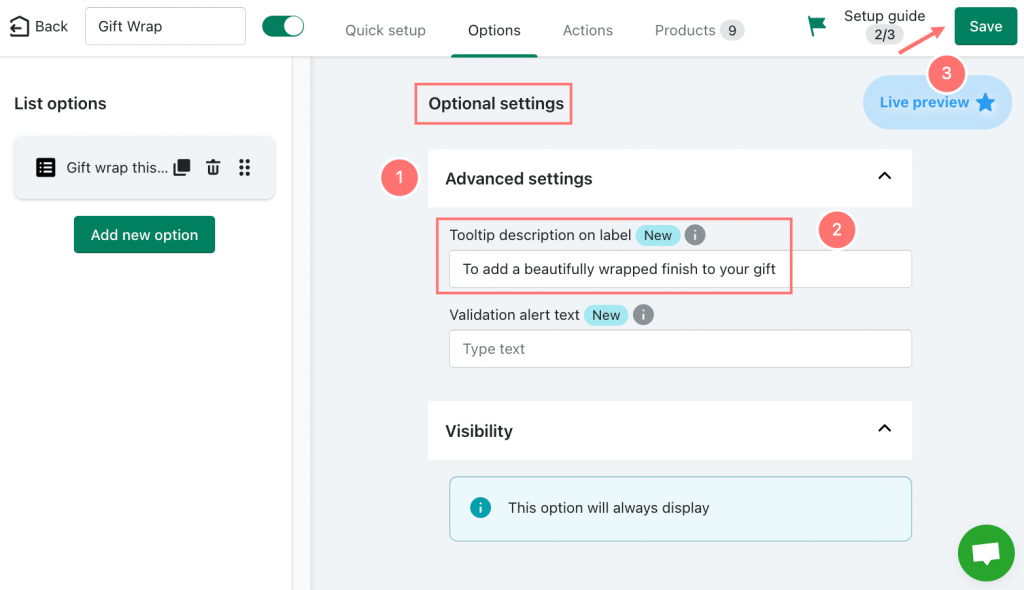
After completing the previous steps, continue scrolling down, and you will see the Optional settings section. Here, you can enable the Show tooltip description on the label option to showcase customers about the wrapping service. Then save your changes by clicking Save button.
Step 3: Assign the Option to Products
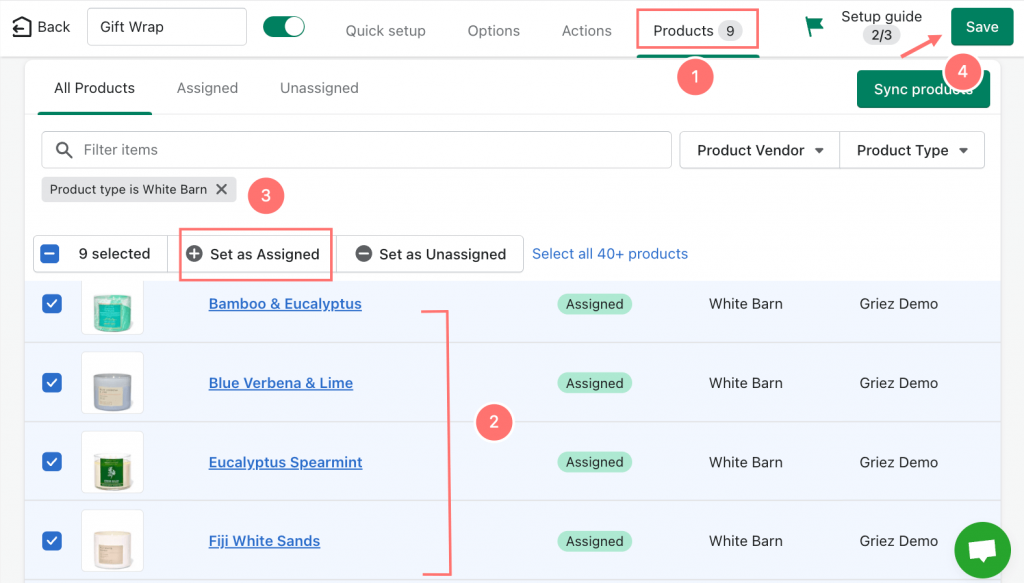
Now, it’s almost the final step. EXPO app provides the convenience of bulk-assigning newly created options and actions to multiple products simultaneously.
Following these steps in Products tab:
- Navigate Products tab
- Select specific product vendors or product types from the dropdown menu to filter the list of products. Once the filtered list appears, you can easily select multiple products by ticking the checkboxes next to each product.
- After selecting the desired products, assign them to the current option set with a simple click.
- Hit Save button so that you have completed the process swiftly and effortlessly
Step 4: Final Results at Front-end
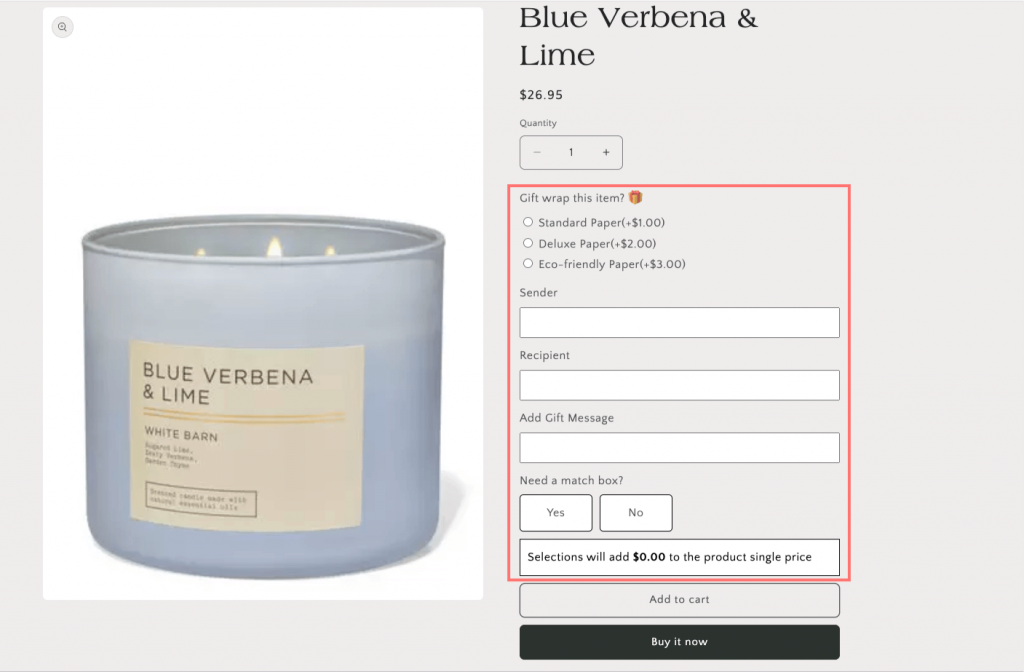
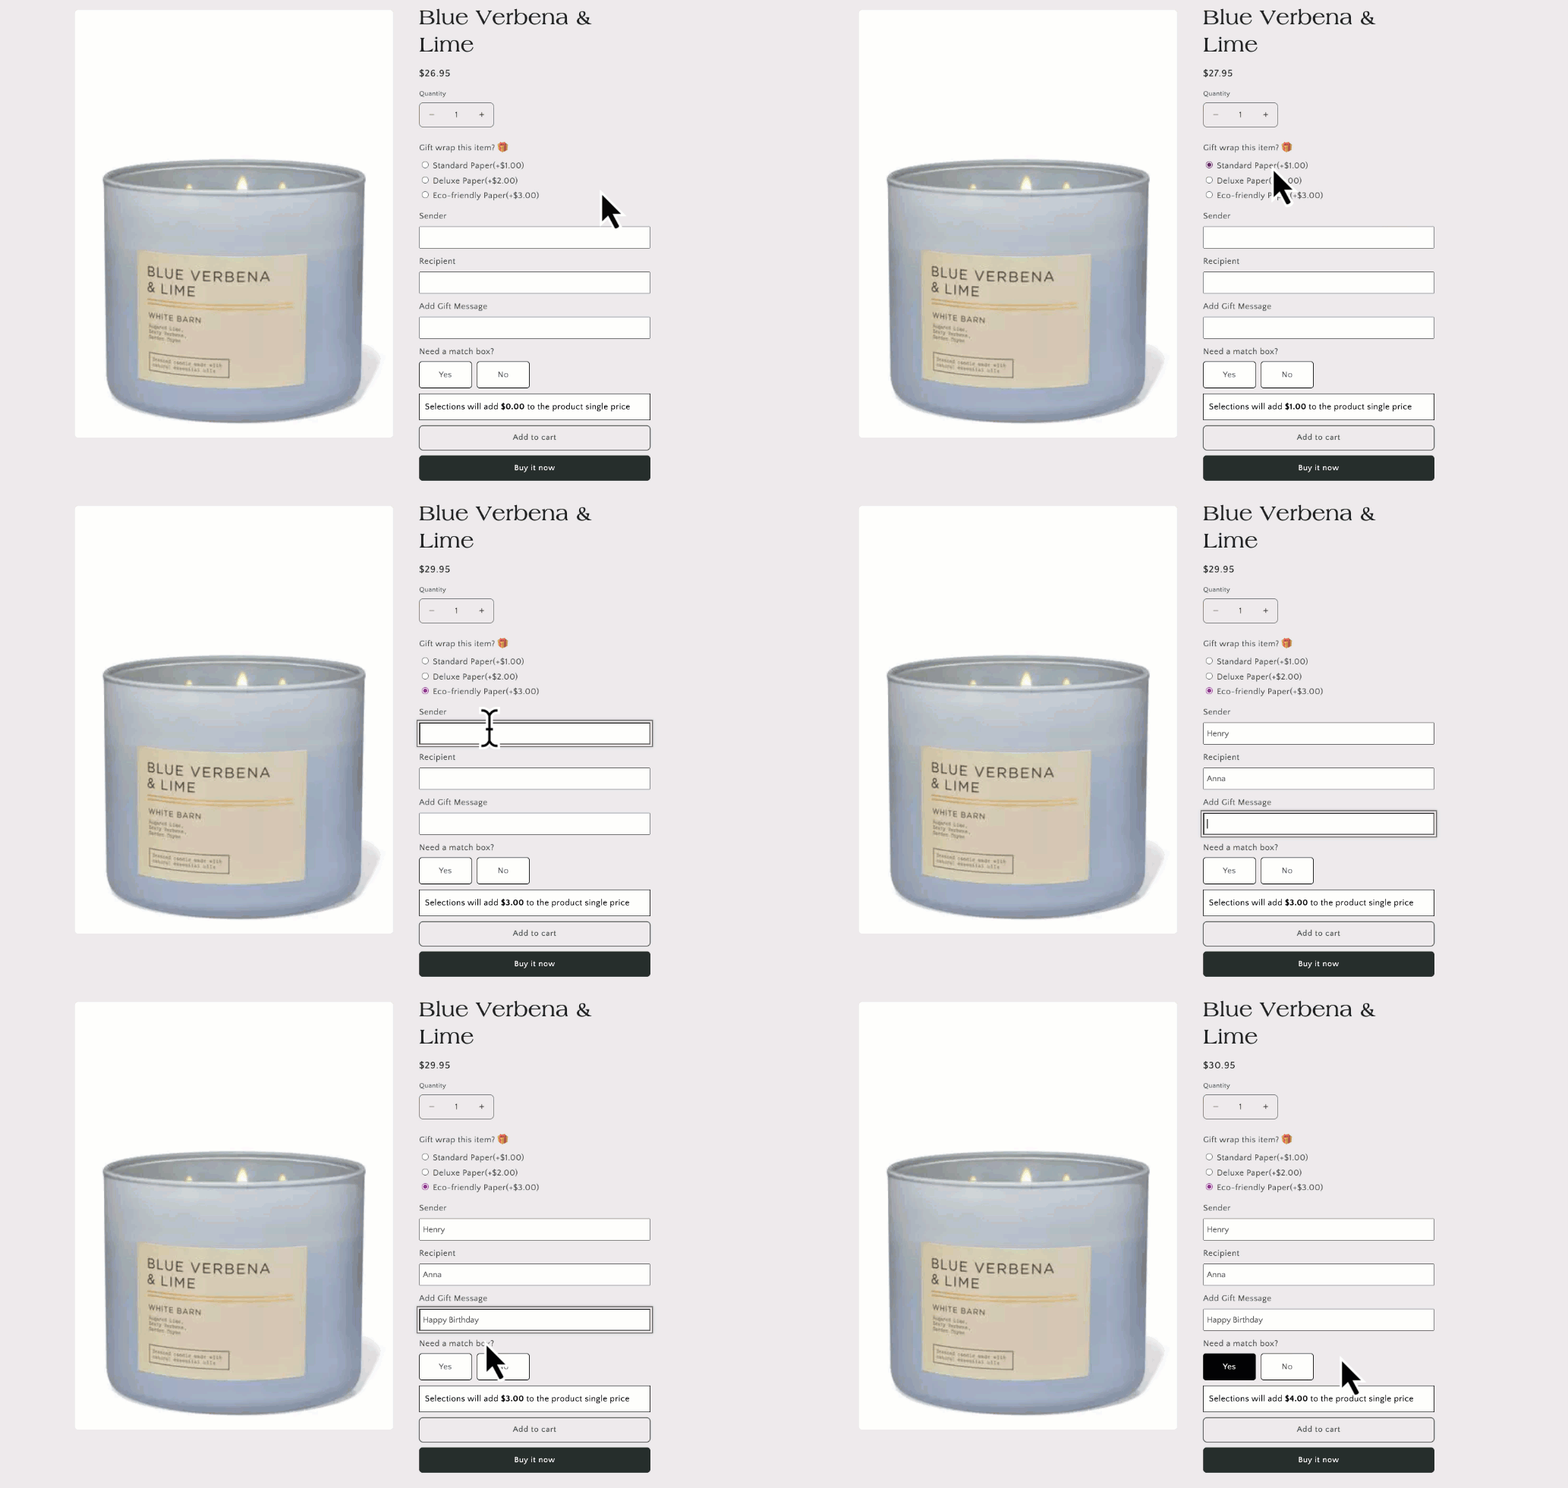
Here’s how the changes made with the EXPO app reflect on the front-end of your Shopify store. Customers visiting your store will now see improved product pages with customizable options, such as gift wrapping styles, displayed prominently.
For a comprehensive gift wrapping service, you can include fields for the sender and recipient information. Additionally, allow guests to leave personalized messages in the gift box to make the delivery more thoughtful and memorable.
Conclusion
By implementing EXPO, you not only improve the functionality and visual appeal of your store but also foster increased customer engagement and satisfaction. With customizable options and streamlined processes, you can differentiate your brand, boost sales, and leave a lasting impression on your customers.
In essence, EXPO enables you to create a more dynamic and customer-centric online shopping environment, positioning your Shopify store for success in today’s competitive e-commerce landscape.
