We’re excited to introduce a powerful new feature in EXPO – Product Options & Customizer for Shopify: Live Preview Text with Custom Font and Color
This enhancement allows customers to see real-time changes when they customize text-based product options, including font style and color, directly on the product page.
Perfect for personalized products like T-shirts, mugs, hoodies, phone cases, gifts, signage, candles, and more.
This feature enables merchants to:
- Allow customers to enter custom text (e.g., name, quote, message)
- Let customers choose font styles
- Let customers choose text colors
- Display a real-time preview of those changes on the product image
With live preview functionality, customers can confidently see exactly what they’re ordering before adding it to the cart.
How to Set It Up in EXPO
In the Option Sets section of the EXPO dashboard, you have created many option sets. You can see the tab Personalize, in which you can Enable personalize for this option set.
Step 1: Enable Personalization in Option Sets
- Go to EXPO Dashboard.
- Navigate to Option Sets.
- Open the desired option set.
- Click the Personalize tab.
- Enable Personalize for this option set.
Once enabled, you can configure preview behavior.
Step 2: Choose a Preview Mode
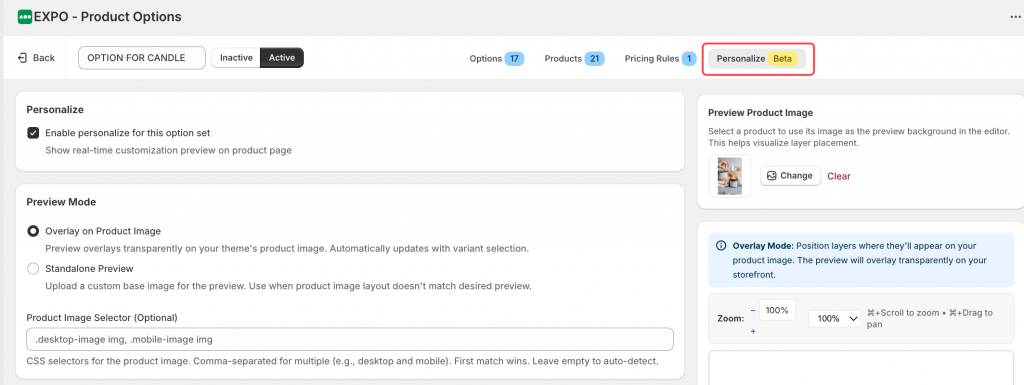
EXPO provides 2 options of Preview Mode:
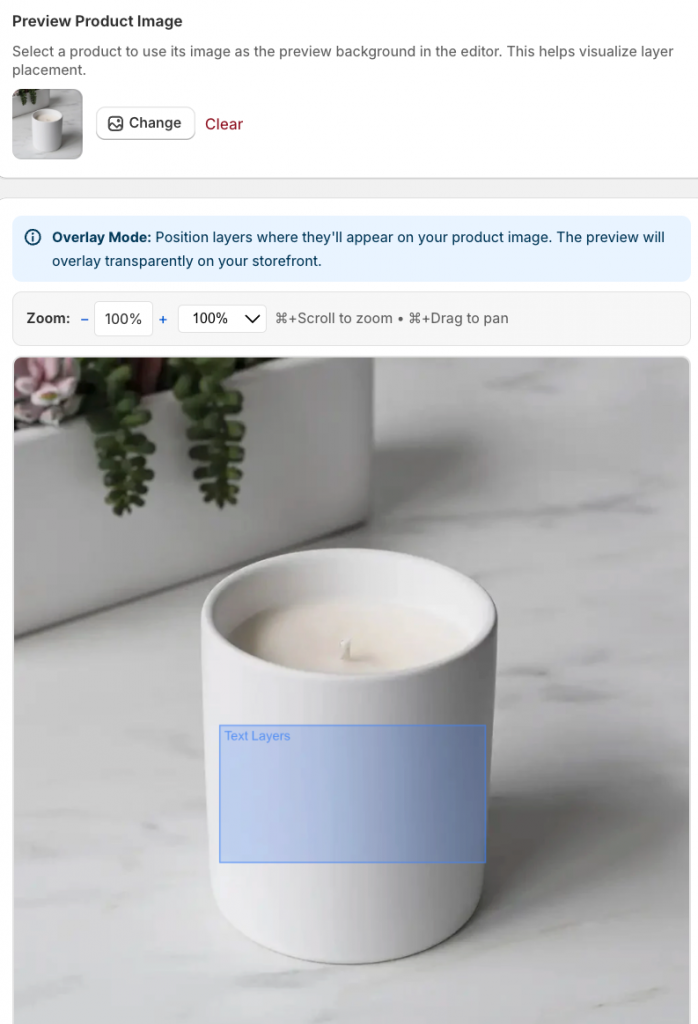
- Overlay on Product Image: Displays the customized text directly on top of the product image.
- Standalone Preview: Displays the customized preview in a separate preview area.
Choose the mode that best fits your product design and layout.
Step 3: Add a Preview Layer
EXPO uses a layer-based system to control preview elements.
To create a preview layer, you will:
- Add a layer to the background image
- Link that layer to specific option elements
- Define what controls the content and what controls the style
- Upload or select your background image
- Click Add Layer
This layer will act as the container for the preview text.
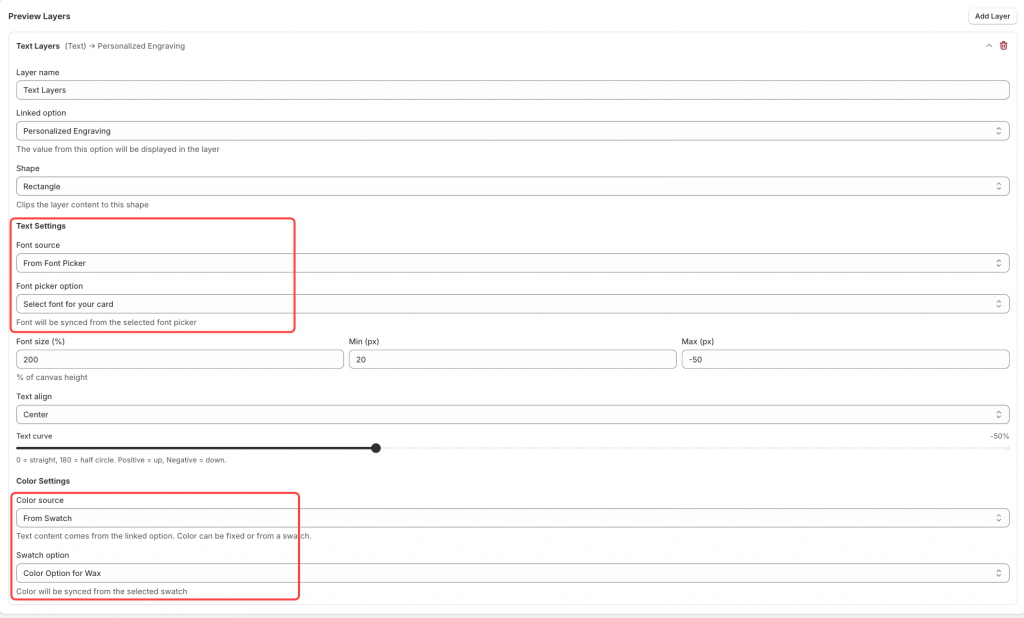
Step 4: Link the Layer to Option Elements
Inside the layer settings, you will see the Link to Option field. This is where you define which option controls the layer.
The layer supports linking for:
- Content: Defines what text appears on the preview.
With this, you can link this to: Text Field element.
Now, whatever the customer types in “Custom Name” will appear in the preview.
- Style: Defines how the text looks.
Style can include: Font family, Font size, Font weight, Text align, Text curve, and Color source.
You can select the font source from the Font picker option to see it on the preview layer.
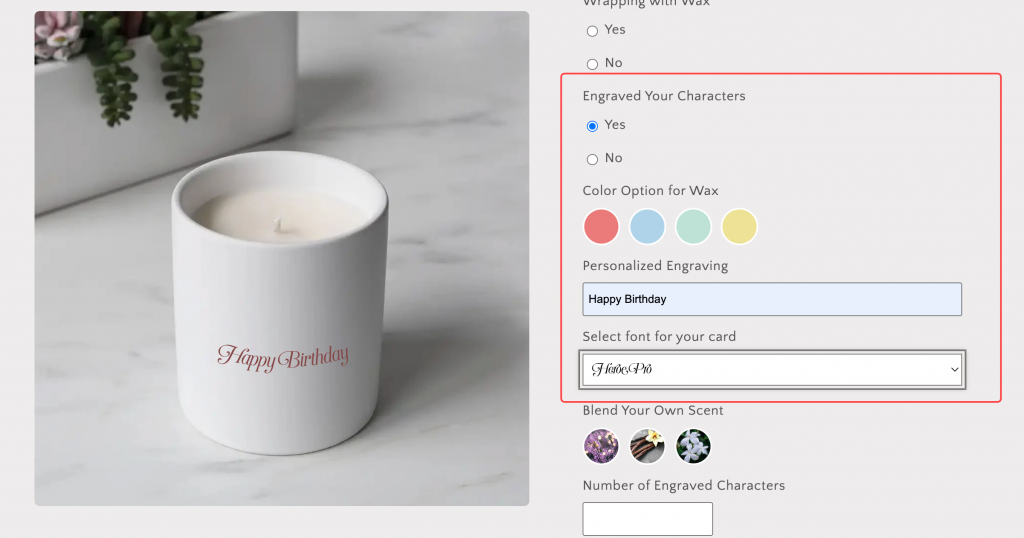
The new Preview Text with Custom Font & Color feature transforms how customers experience personalized products.
Instead of imagining the result, they see it. And when customers see it, they buy with confidence.