To configure emails for your withdrawal process, navigate to the E-Mail tab within the app’s Einstellungen (Settings).
Activate Emails
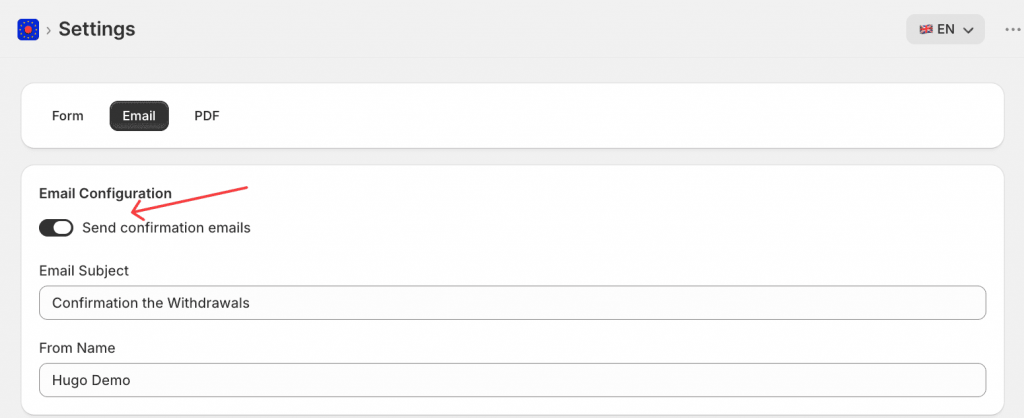
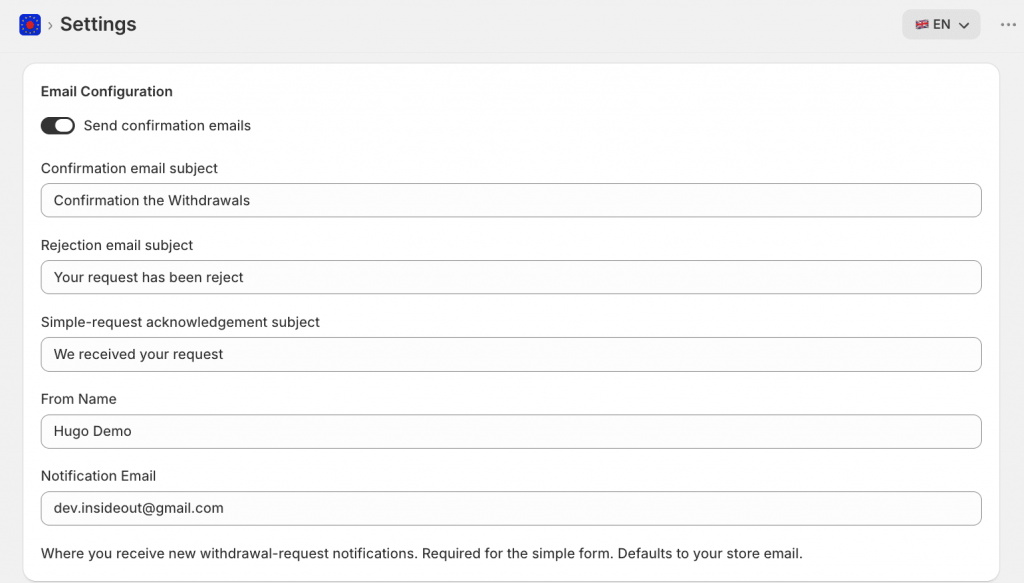
Toggle the “Bestätigungs-E-Mails senden” switch to ON to enable automated emails for your customers.
When this toggle is OFF, all customer-facing emails are skipped – confirmation, acknowledgement, and rejection emails will not be sent. Your own merchant notification emails are unaffected and will still go out.
Configure Sender Details
- Sender Name: Enter the name you want customers to see in the From field when they receive an email from the app. This is the display name only – it does not change the actual sending address unless you set up a custom domain.
- Email Subject: Each customer-facing email has its own subject line field. If you leave any of these fields blank, the app uses its built-in default subject. The default is automatically shown in German or English, depending on the language your withdrawal form is set to.
- Confirmation subject: The subject line for the withdrawal confirmation email sent to the customer after a Standard form submission. For example: “Your withdrawal confirmation”.
- Rejection subject: The subject line for the email sent to the customer when you reject their request.
- Simple acknowledgement subject: The subject line for the short “we received your request” email sent after a Simple form submission.
- Notification Email: Enter the email address where your merchant notification emails will be delivered. This field is pre-filled with your store’s default email address, but can be changed at any time. Merchant notifications are sent every time a withdrawal request comes in – both for Standard form submissions and Simple form submissions.
Note: A notification email address is required to use Simple form mode. The app will block saving Simple mode until this field is filled in.
Add Branding
- Logo: Upload your store’s logo to be displayed at the top of the email. Use a PNG or SVG file (max 2MB), which will be centered with a maximum width of 200px.
Customize the Footer
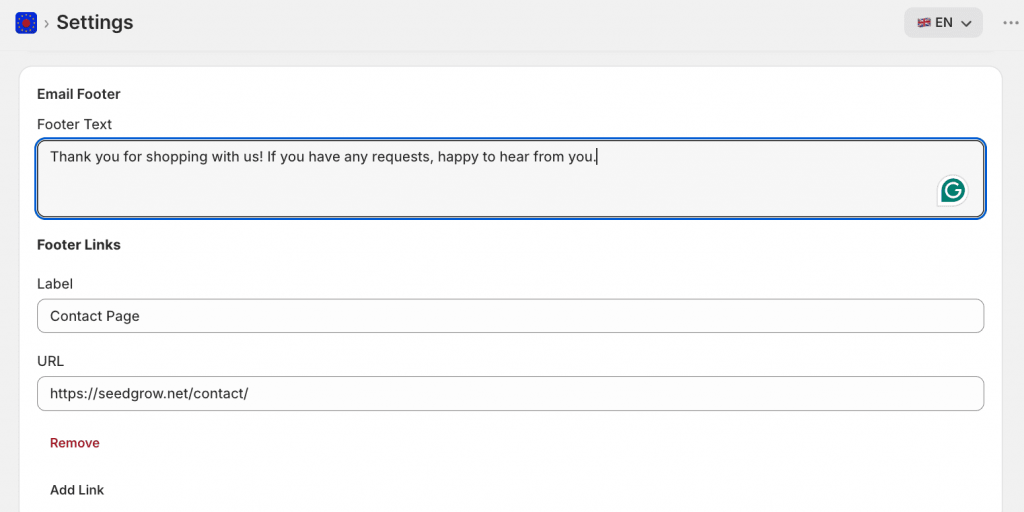
- Footer text: Enter a short message to appear at the bottom of every customer email. This is a good place for a note like “Thank you for shopping with us” or a brief returns policy reminder.
- Footer links: Add one or more links to the email footer, such as your legal notice, privacy policy, or contact page. For each link, provide a label (the clickable text) and the full URL.
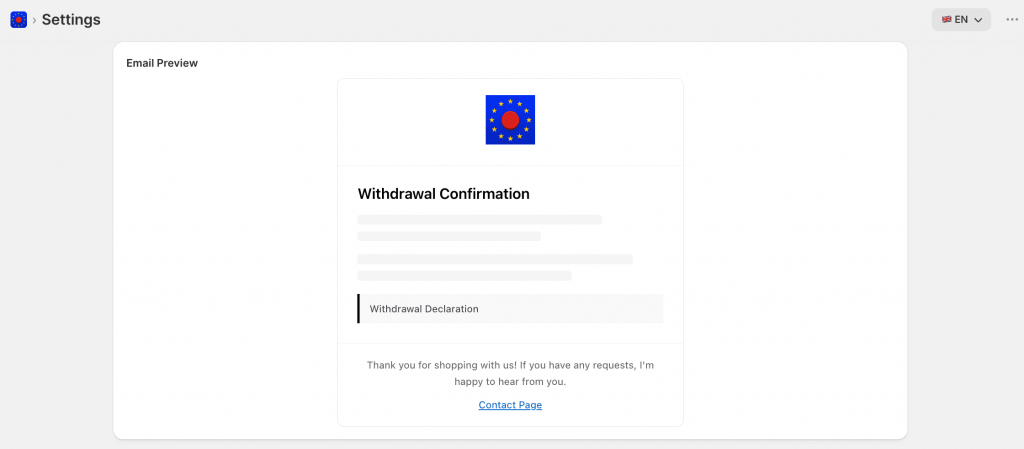
Email Preview
You can check how your emails will look to customers at any time in the Email Preview section at the bottom of the Settings → Email page. This reflects your current branding, subject lines, and footer configuration.
Domain Authentication (Pro Feature)
To send emails from your own domain (e.g., [email protected]), enter your domain in the Absender-E-Mail section and click Domain authentifizieren.
This will provide the necessary DNS records (typically for SendGrid) to verify your domain.
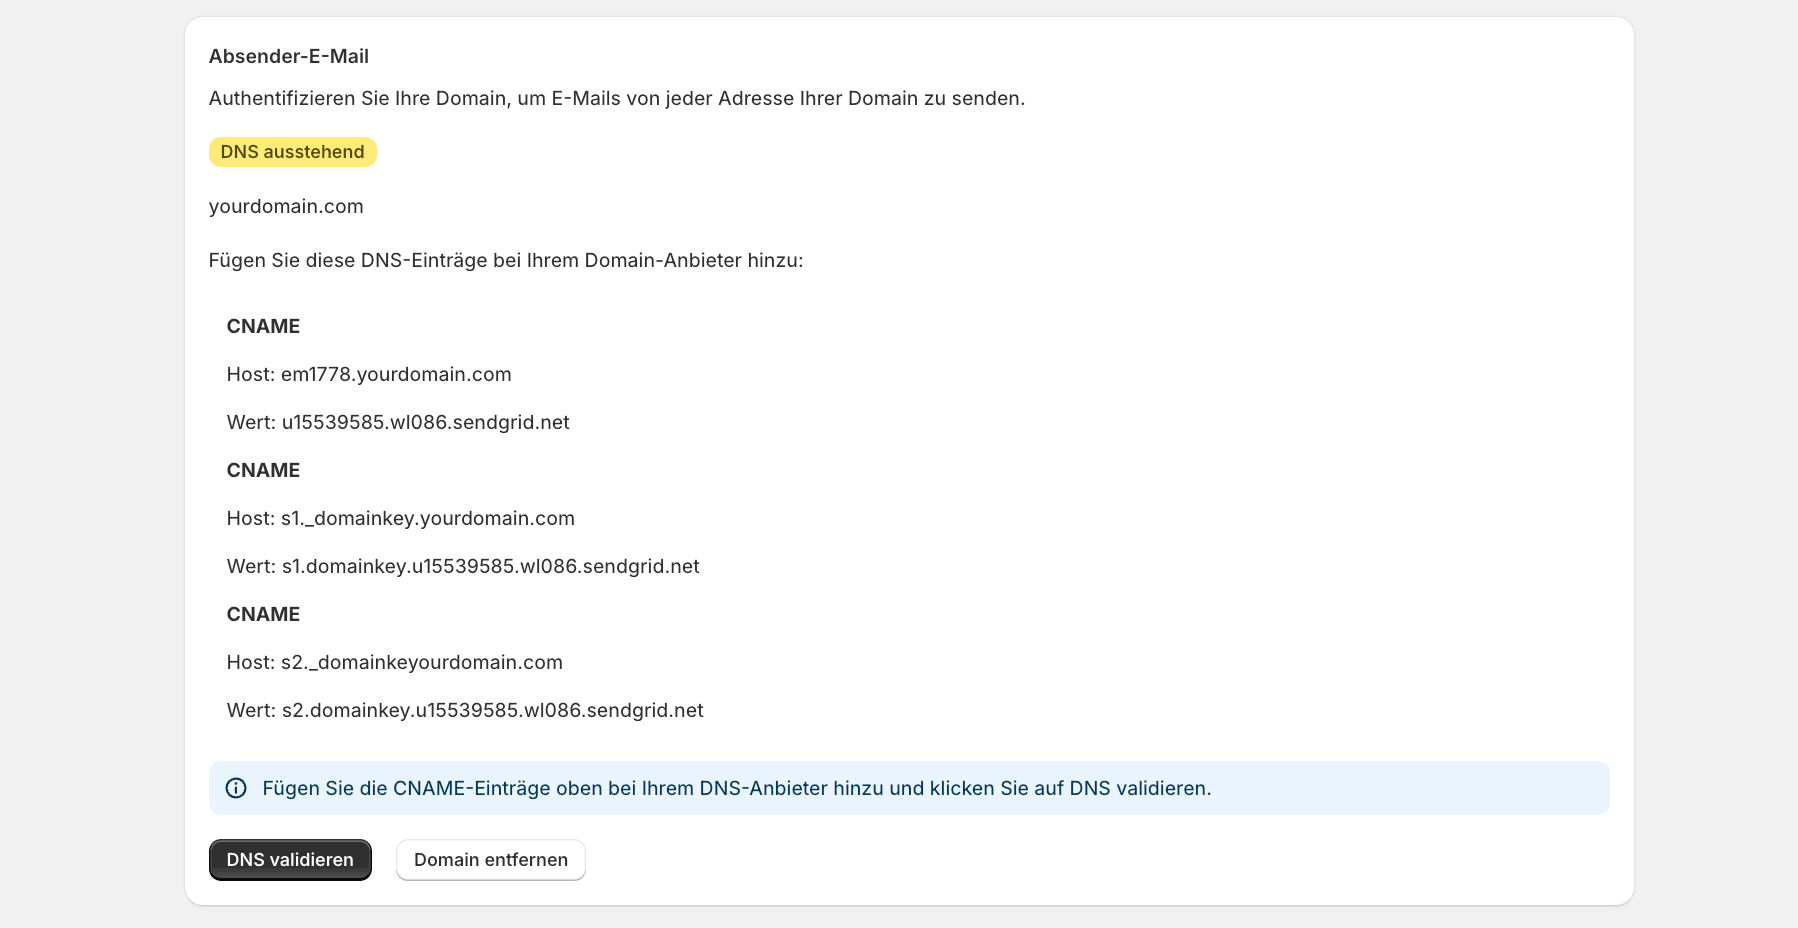
By default, emails are sent from a shared SeedGrow address. With the Pro plan, you can send emails from your own domain – for example, your-store.com.
To set this up:
- Enter your domain
- Click Authenticate domain.
- The app will display the DNS records you need to add to your domain (via SendGrid).
- Add those records to your domain provider’s settings.
- Once verified, all outgoing customer emails will show your domain as the sender.
Note: Domain verification may take up to 24 – 48 hours to propagate, depending on your DNS provider.