
If you are looking to:
- add WhatsApp to Shopify,
- create a unified and memorable experience for your customers by customizing the look and feel of the WhatsApp chat widget to match your Shopify store’s branding,
- add automated triggers to welcome customers as they enter,
- and craft engaging messages,
Then don’t miss out on this Shopify WhatsApp integration tutorial with whole a lot of tips and tricks.
You can take your customer experience to the next level with just a few simple steps to add WhatsApp chat widget to your Shopify store using WhatsApp Chat Widget by SeedGrow.
Table of Contents
Why Should Add a WhatsApp Chat Widget to Shopify?
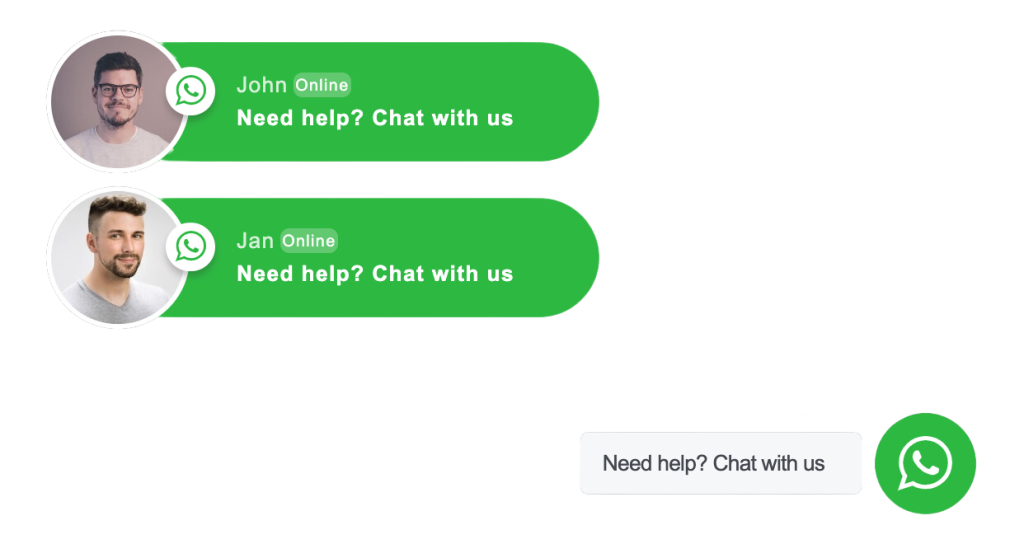
If you’re looking to smooth out your customer support flow, I highly recommend throwing a WhatsApp widget into your theme. It lives down in the bottom right corner, completely out of the way until a user clicks it to spin up a live convo with your team.
It’s a super low-friction way to handle real-time QA.
In particular, adding a WhatsApp live chat button to your Shopify store can be a game-changer for your business. The WhatsApp Business API can be seamlessly integrated with Shopify, giving your customers the ability to connect with your business via their preferred messaging app.
This integration provides a convenient and powerful way for you to connect with your customers, leveraging the popularity of both WhatsApp and Shopify.
Read more: Why should leverage WhatsApp Chat Widget for your Shopify store?
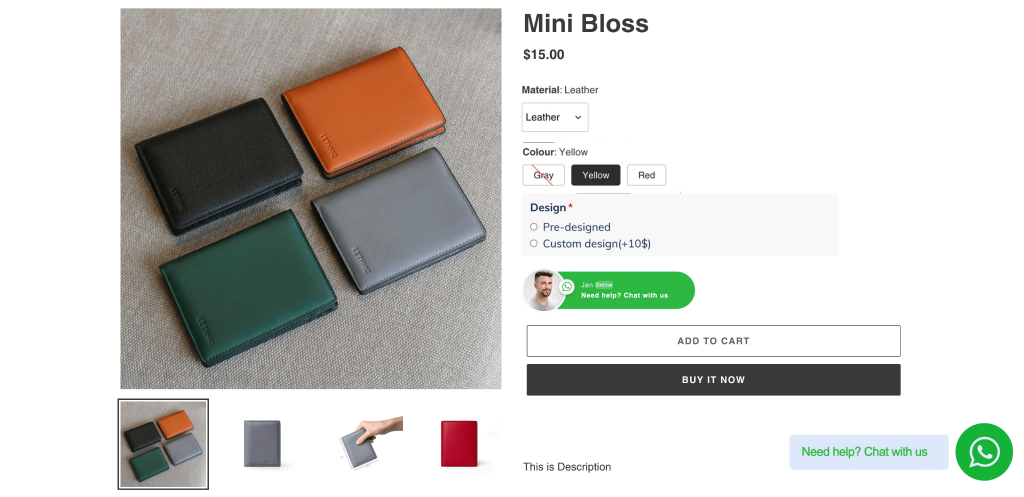
If you’re looking to enhance your Shopify store by including different variants for your products and additional options, then Vario – Variation Swatches and EXPO ‑ Extra Product Options are two great options to consider. These apps can help you achieve a similar result as seen in the image above.
How to Add WhatsApp Chat Widget to Your Shopify Store?
Integrating WhatsApp with your Shopify store is a quick and easy process that can be done through the installation of a WhatsApp live chat widget app. This app can be incredibly beneficial, as it saves time and does not require any coding skills.
There are many apps available that can help you add a WhatsApp button to your store, with the WhatsApp Chat Widget SeedGrow app being one of the highest-rated options. Additionally, there is a free version of the app that you can try out before committing to a paid version.
Ready to give it a go? We’ve got you covered with easy-to-follow steps on how to add a charming chat widget to your Shopify store. Let’s get started!
Step 1: Set Up A New Support Member
By incorporating WhatsApp Chat Widget for Shopify, you can include multiple support personnel to guarantee prompt responses to customer inquiries.
In WhatsApp Chat Widget > Accounts, you can easily add new, edit, or delete members.
To set up a new support agent to your WhatsApp accounts list, follow these steps:
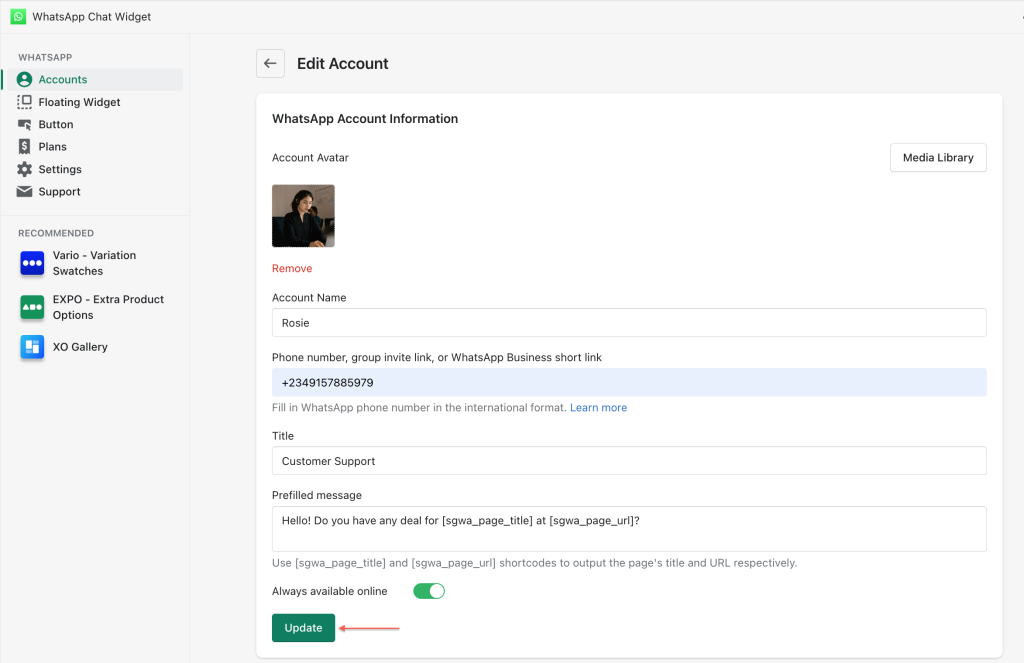
Upload avatar
This individual profile picture will be used in the WhatsApp button and also the WhatsApp widget.
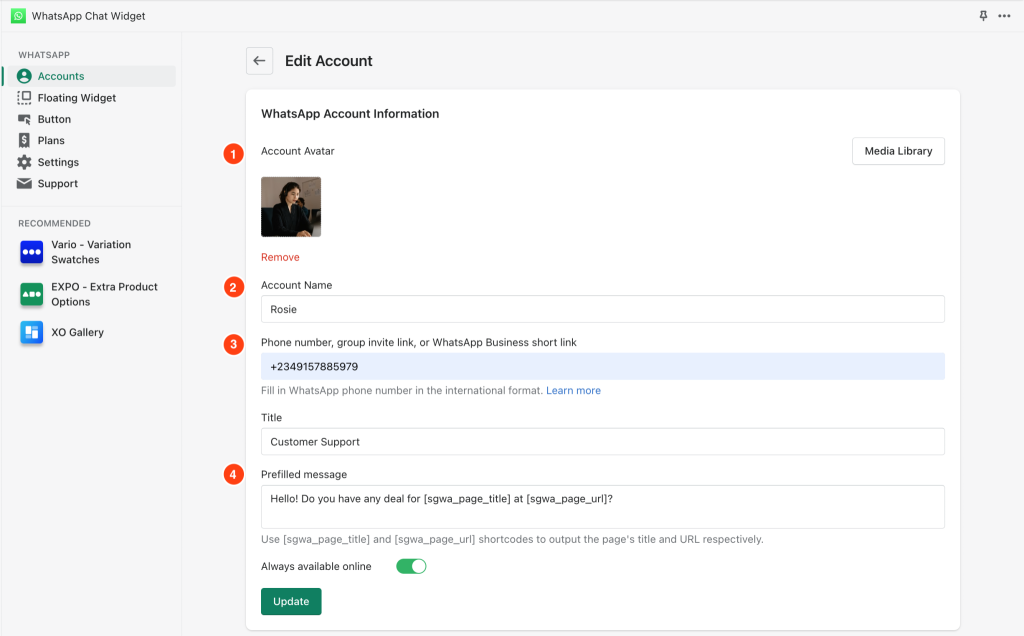
Fill in personal information
Fill in the account name, member’s title. This information will be used to add WhatsApp to Shopify.
Fill in the contact information
Fill WhatsApp phone number, WhatsApp group invite link or WhatsApp Business short link. If it is phone number, please don’t use space or special characters like “-” or “()”.
Fill in the WhatsApp phone number in the international format, including (+) sign.
Eg: +2349157885979
You can also use WhatsApp Group Invite link to let the customers join chat, or use WhatsApp Business message link.
Eg:
https://chat.whatsapp.com/alNmIJQNW8Vzznw4YZma https://wa.me/message/FF7Y3ZYGWARVJ1

Step 2: Script out WhatsApp Prefilled Message
Moving to the next section in WhatsApp Chat Widget > Accounts, WhatsApp Chat Widget SeedGrow’s prefilled message feature allows you to create an incredibly personalized customer experience with automated messages.

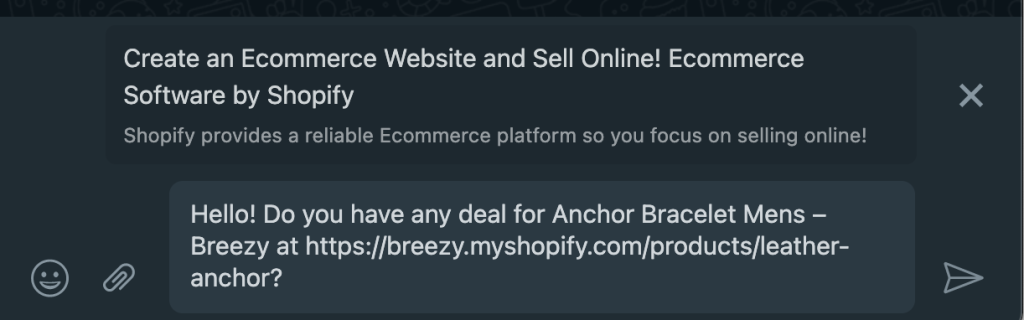
In this Prefilled message, you need to script the question that customers may ask. WhatsApp Chat Widget SeedGrow provides two shortcodes that you can freely put into the message and the plain text.
- [sgwa_page_title] can be used to dynamically show the current product name or store page title.
- [sgwa_page_url] can be used to dynamically show the product or collection page URL where the customer starts the chat.
When customers open a conversation in the WhatsApp app, this tailored message is ready for them to send out right away if they have that exact question as the message.
Step 3: Set Up Working Hours for WhatsApp Support Agents
1. Turn on/off Always available online button
In WhatsApp Chat Widget > Accounts, you can toggle the Always available online button in accordance with the agent’s online/offline status and additional notice.
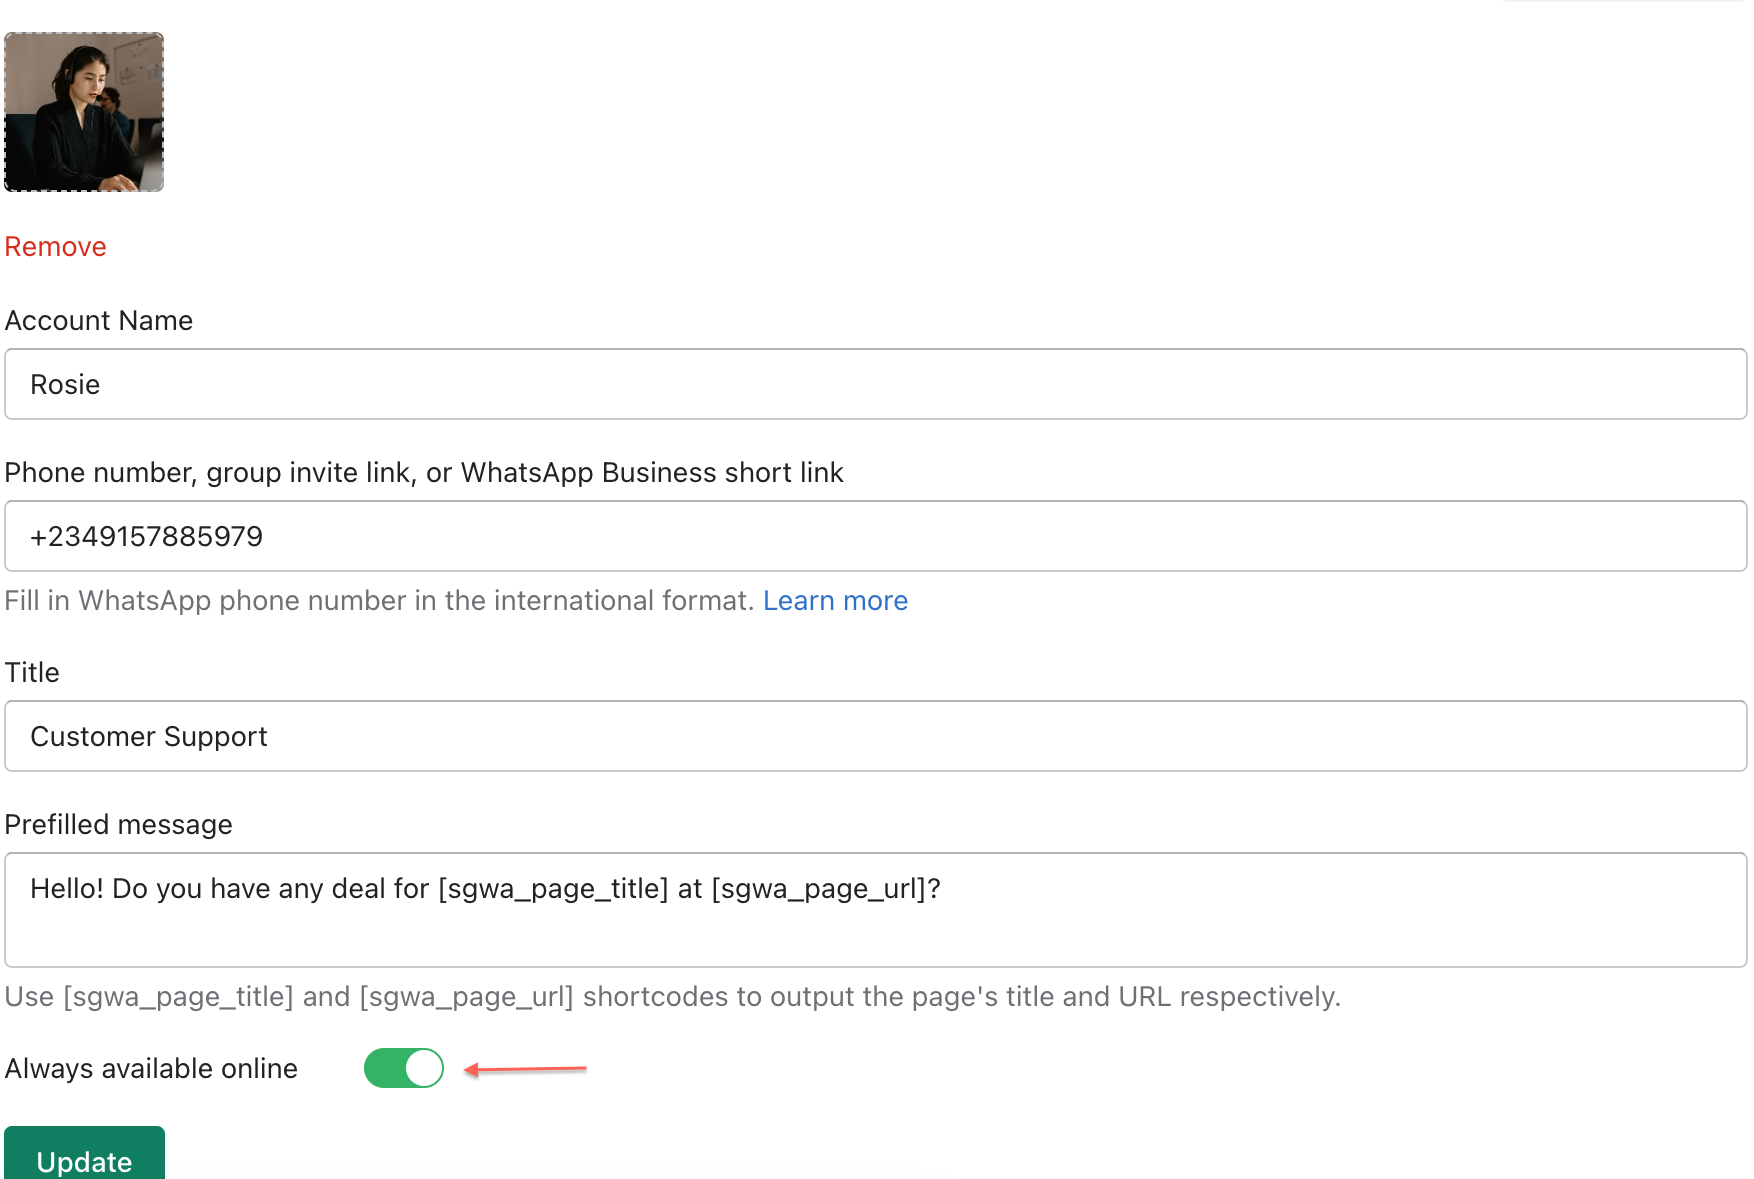
If you toggle ON the option for Always available online, then the WhatsApp contact will always appear online.
If you switch to Not Always available online, there will be added more options to customize the availability of support members.
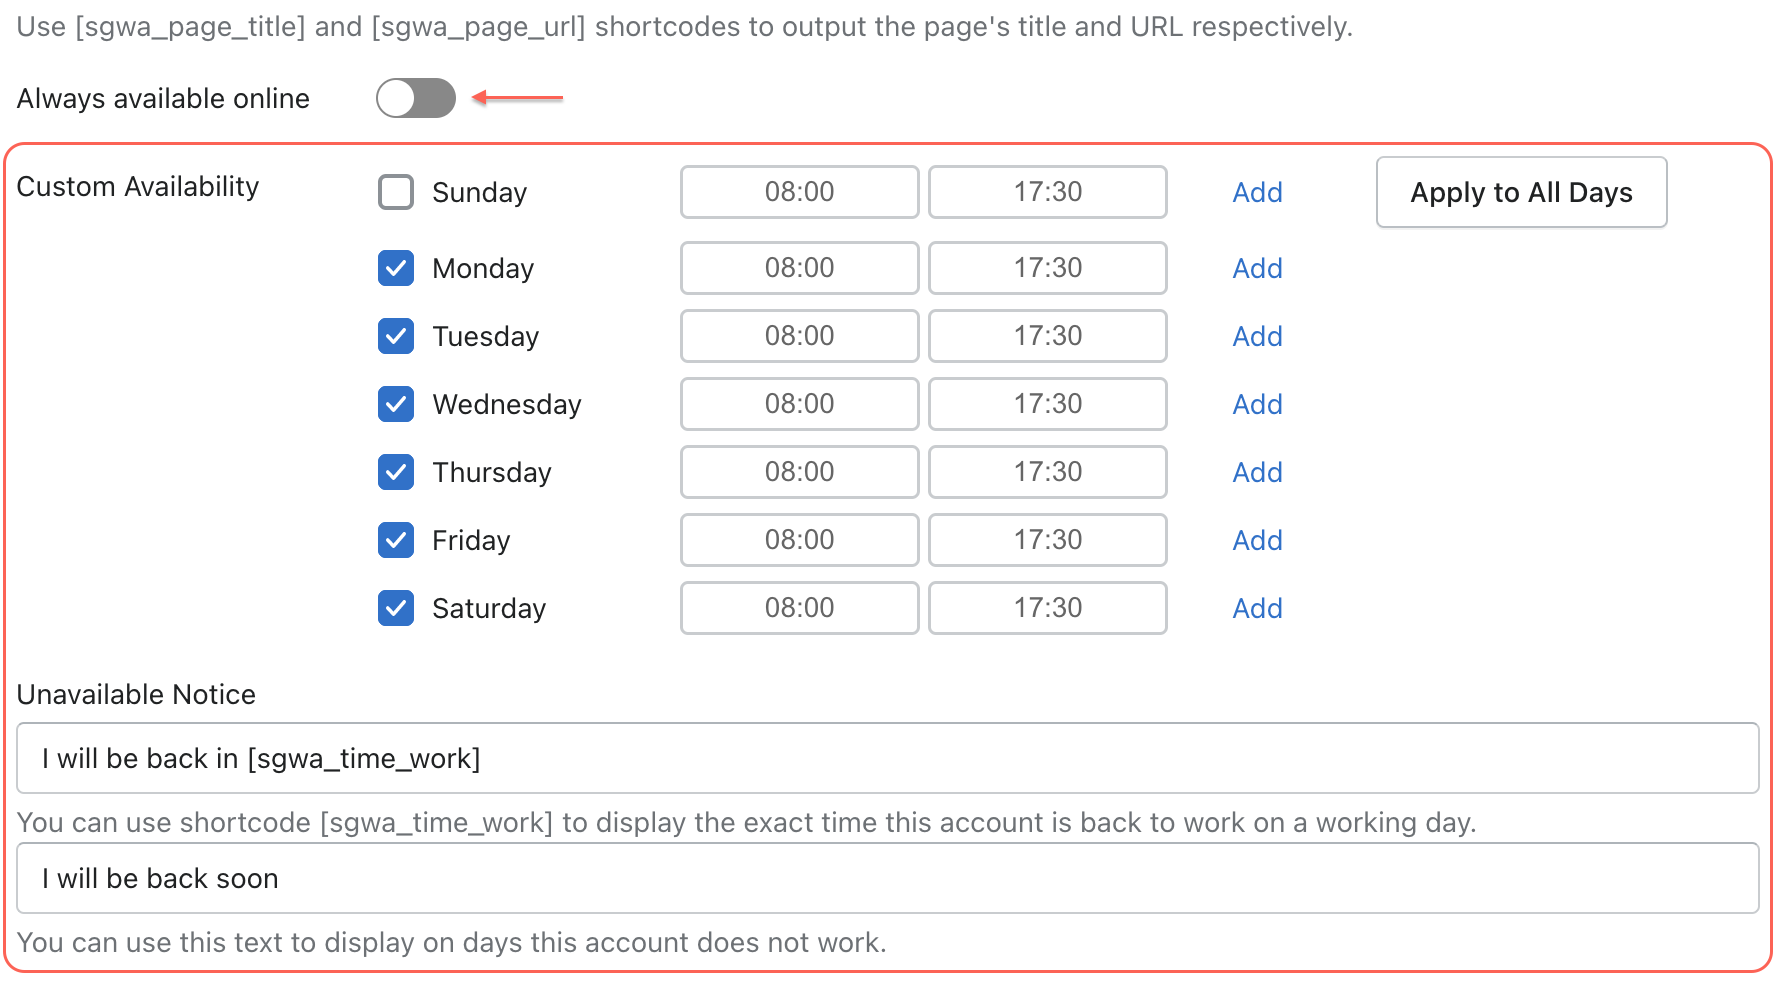
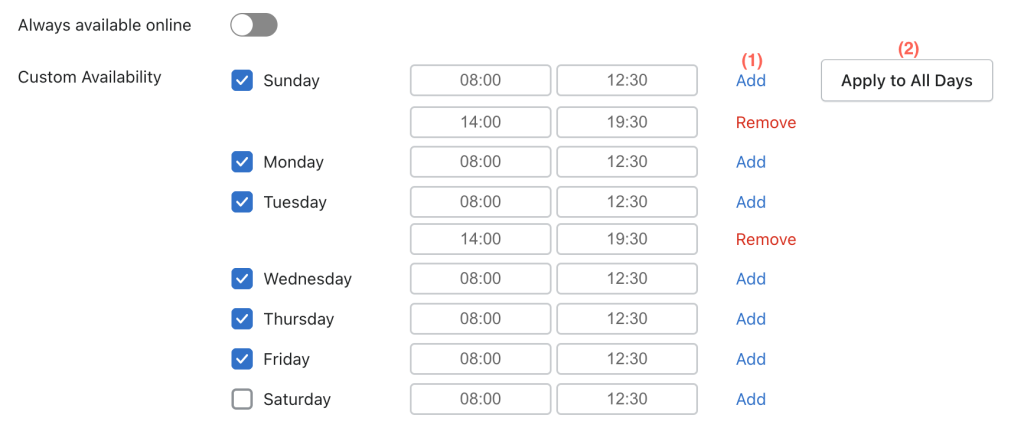
2. Customize the Custom Availability
Customize the Custom Availability to let your customers know who is available and when a certain support member comes back for them. Add your business days, hours, and multiple shifts.
(1) Click “Add” to add more time range that you are available in a day.
(2) Click “Apply to All Days” to duplicate the time range for the rest of the week.
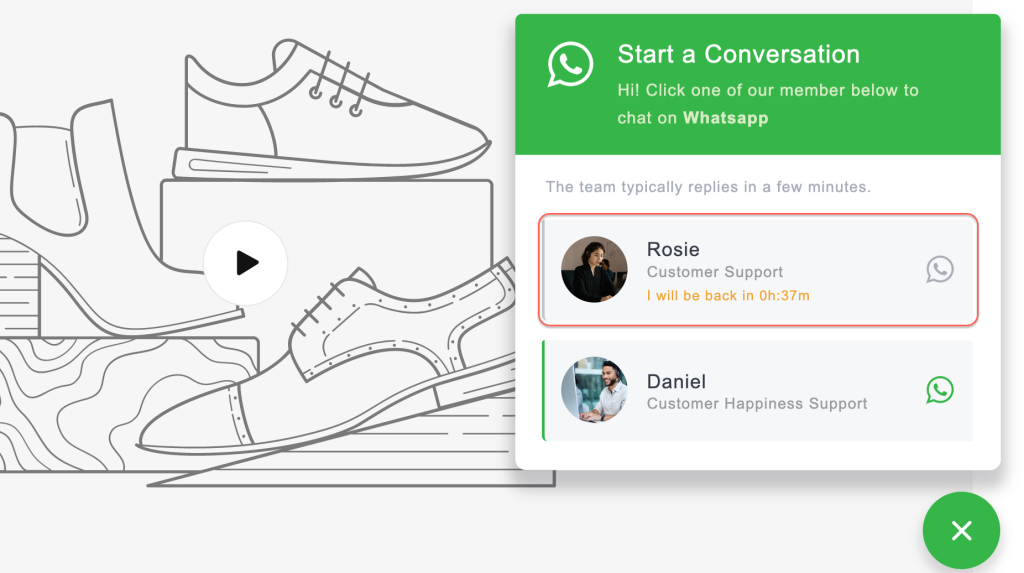
3. Fulfill the Unavailable Notice

Description text displayed on a working day: Display custom text when you’re working but not yet available. Use [sgwa_time_work] shortcode to automatically show the remaining time so that your customers know how much longer they have to wait.
Description text displayed on a day-off: Display custom text on the day you’re off from work.

Finally, click Create Account button.
Step 4: Show WhatsApp chat widget on the Shopify store
Online Store 2.0 themes provide the flexibility to build your store pages in a block-based customizer. If you’re using a 2.0 theme, this user guide is specifically for you. But if you don’t use Online Store 2.0 themes, the steps needed to take is quite similar.
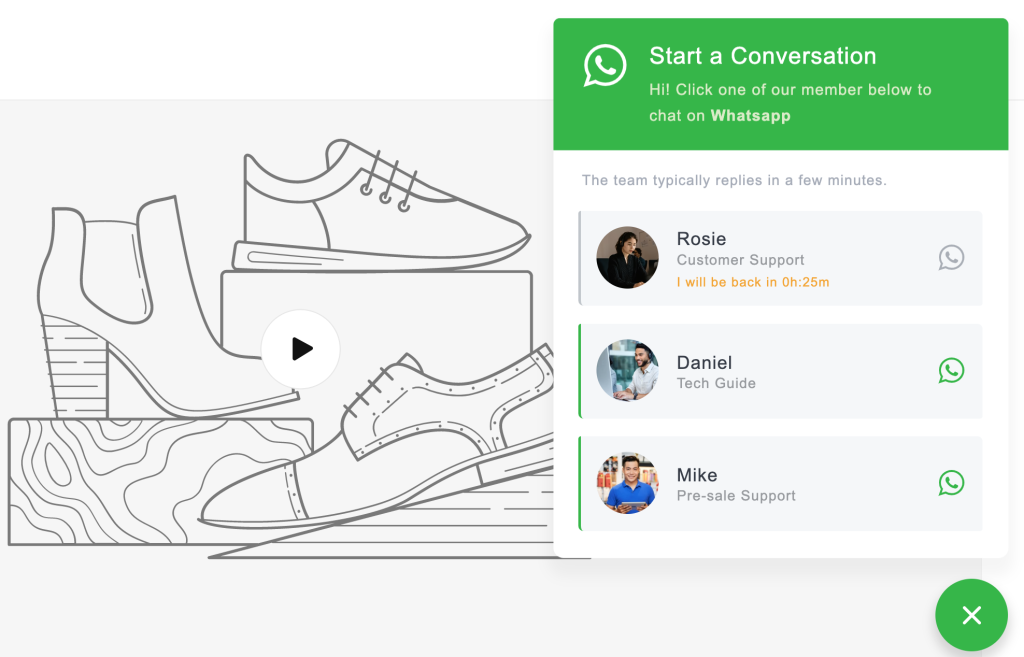
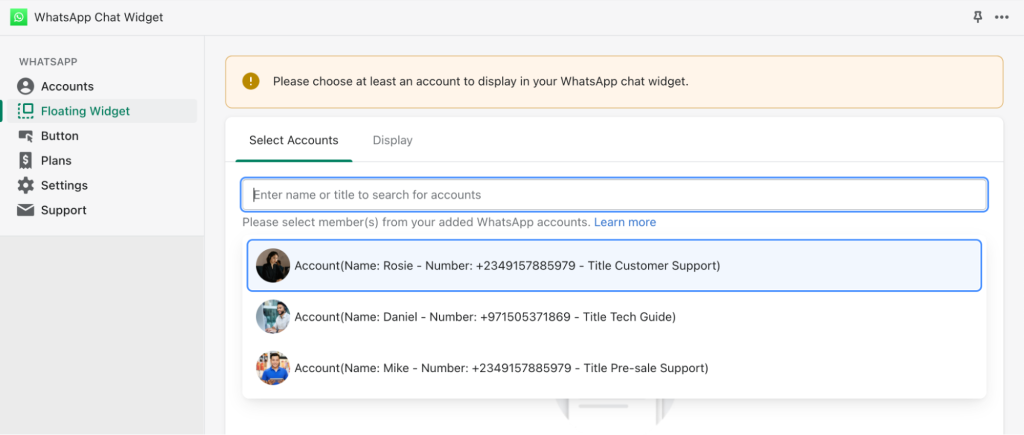
1. Add member(s)
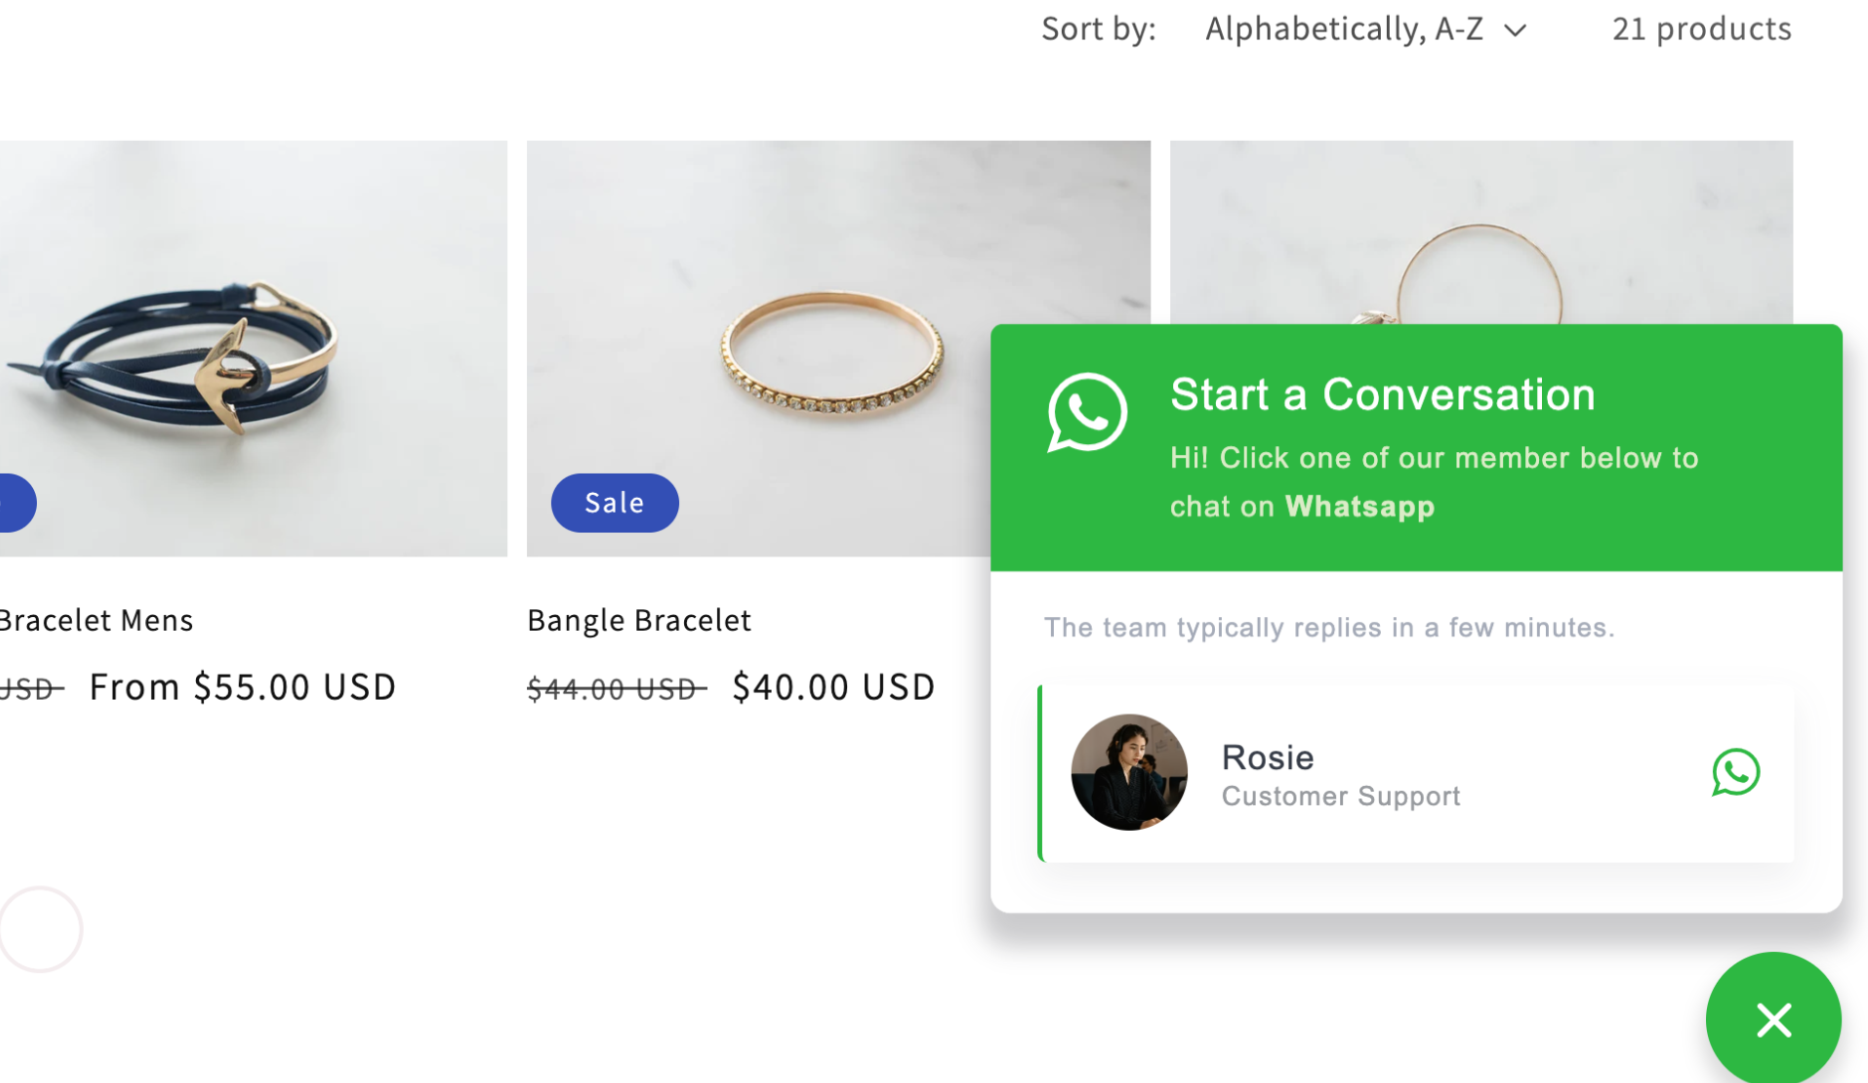
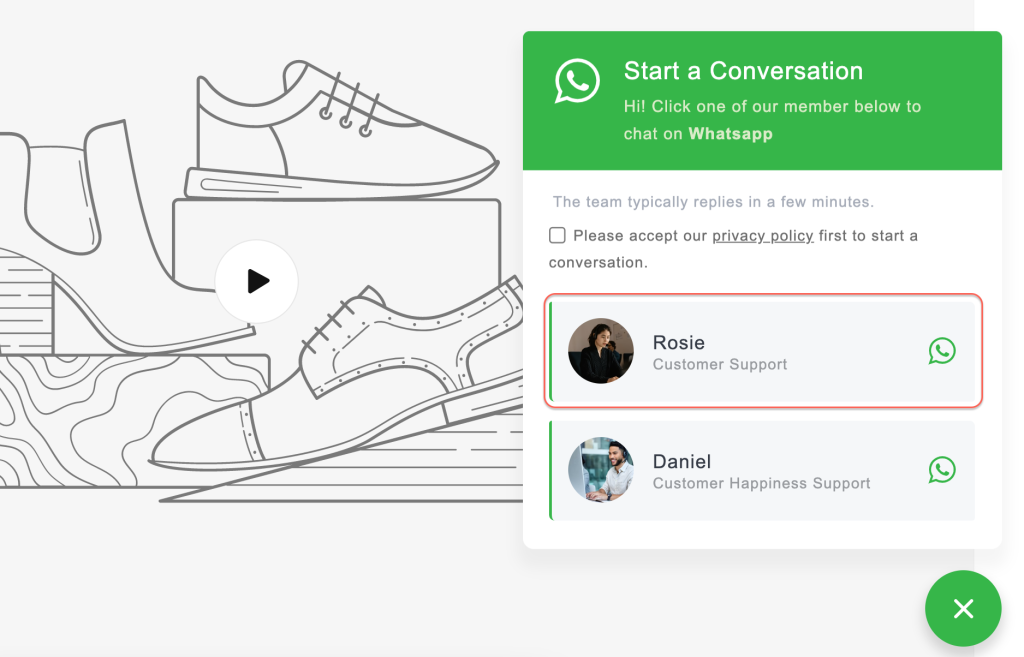
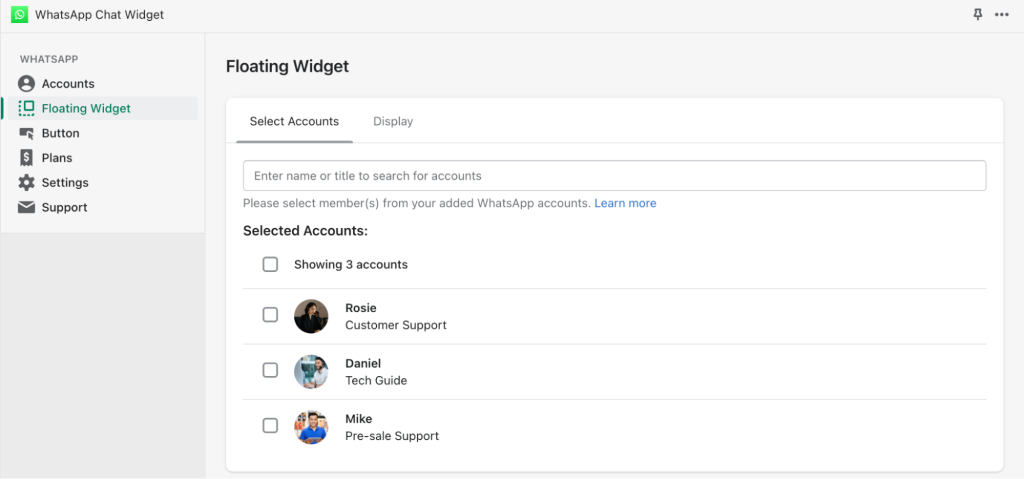
Let’s get started by adding an account to the widget box. You can also add multiple members if you wish to display them all at once.
Once selected, your WhatsApp support member would look like this.
2. Enable app embed
Secondly, go to the tab Display and press the Go to Customize button.
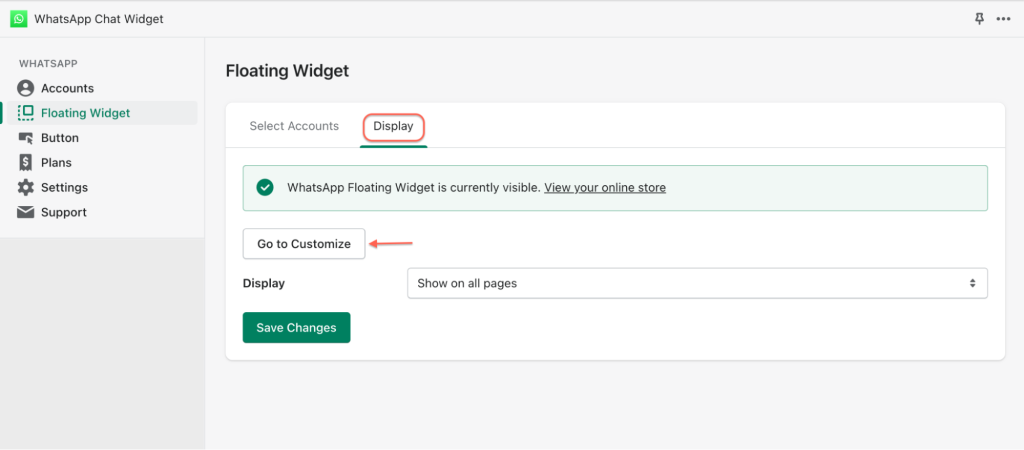
A theme customization space will be opened in a new tab and WhatsApp Chat Widget in App embeds will be automatically enabled and expanded. You will see its customizable settings and preview the changes in your theme customizer.
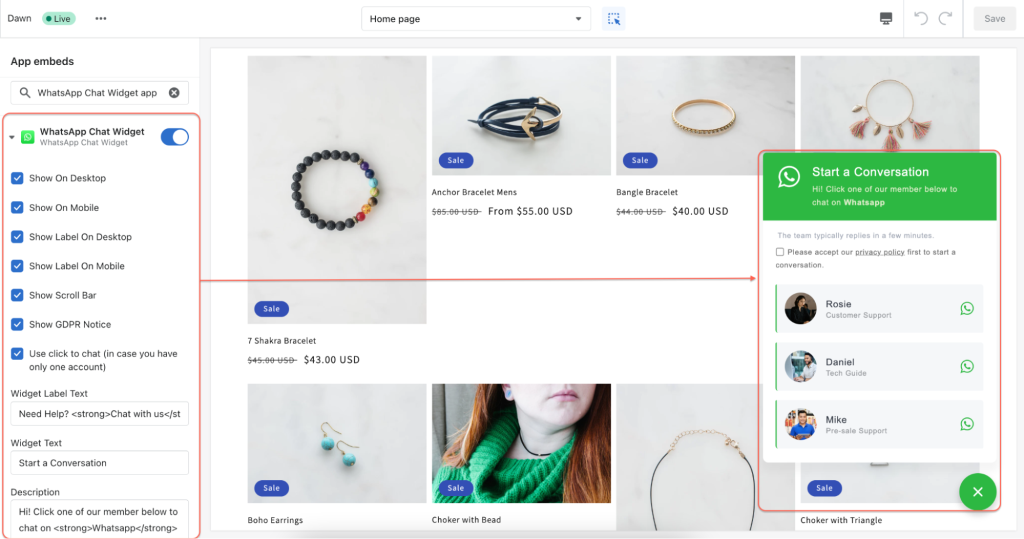
3. Show/hide the WhatsApp widget on specific pages
Optionally, you can adjust the visibility of the WhatsApp chat box in the Display options.
For instance, if you want to display it on all pages except for the cart page, you can set it up as shown below.
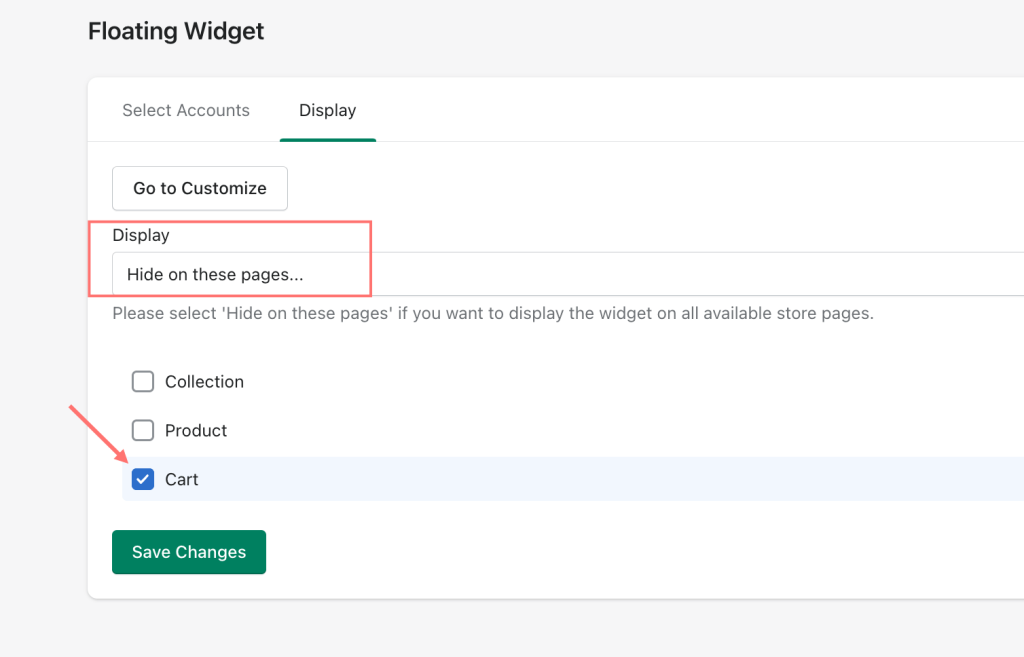
Then just click Save changes

BONUS: Elevate the WhatsApp Chat Widget
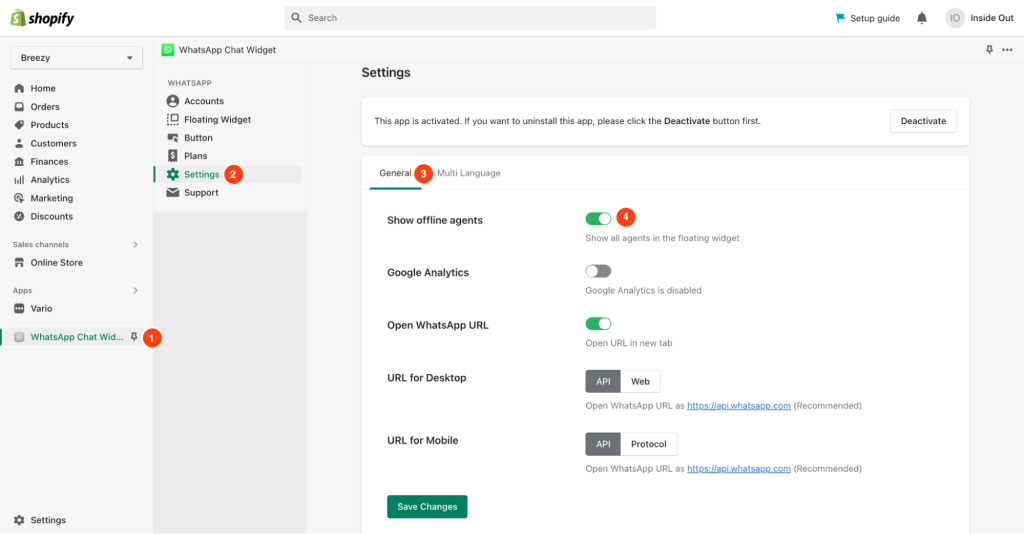
1. Show/Hide offline agents
To achieve this, go to WhatsApp Chat Widget > Settings > General > Show offline agents (Toggle ON or OFF).
This is an image showing how to show/hide offline agents:
2. Translate text
Make sure you have published additional languages in your store settings.
For example, in the Languages tab, navigate to Translated languages and here I have German, Italian, and Chinese.
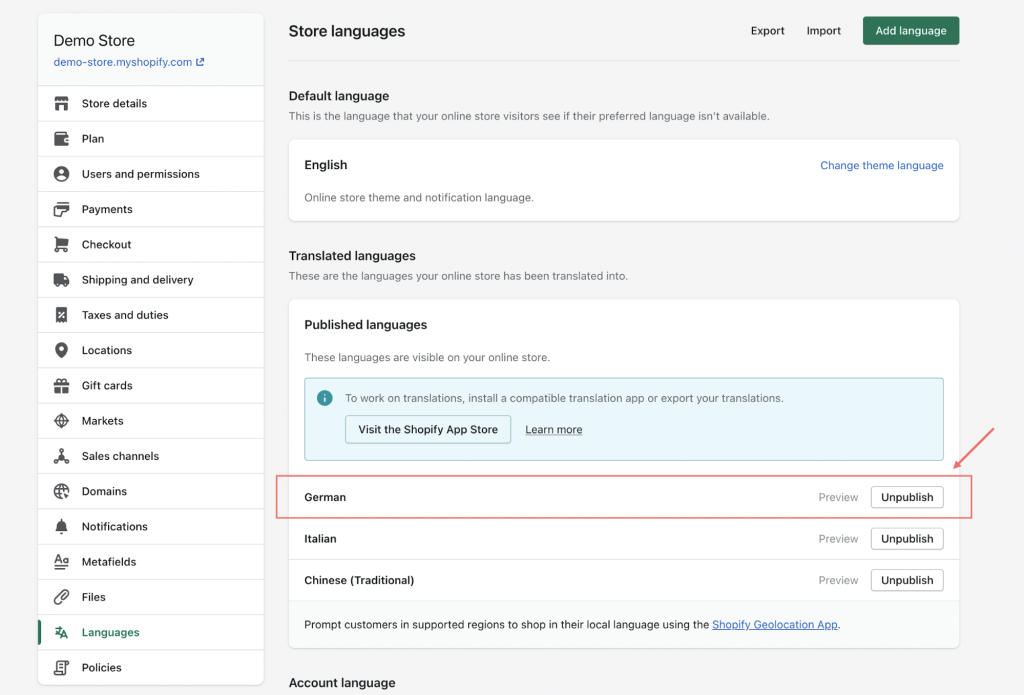
The WhatsApp Chat Widget will read these languages and import them to the app settings.
Below you will find the step-by-step on how to translate the WhatsApp chat widget and button.
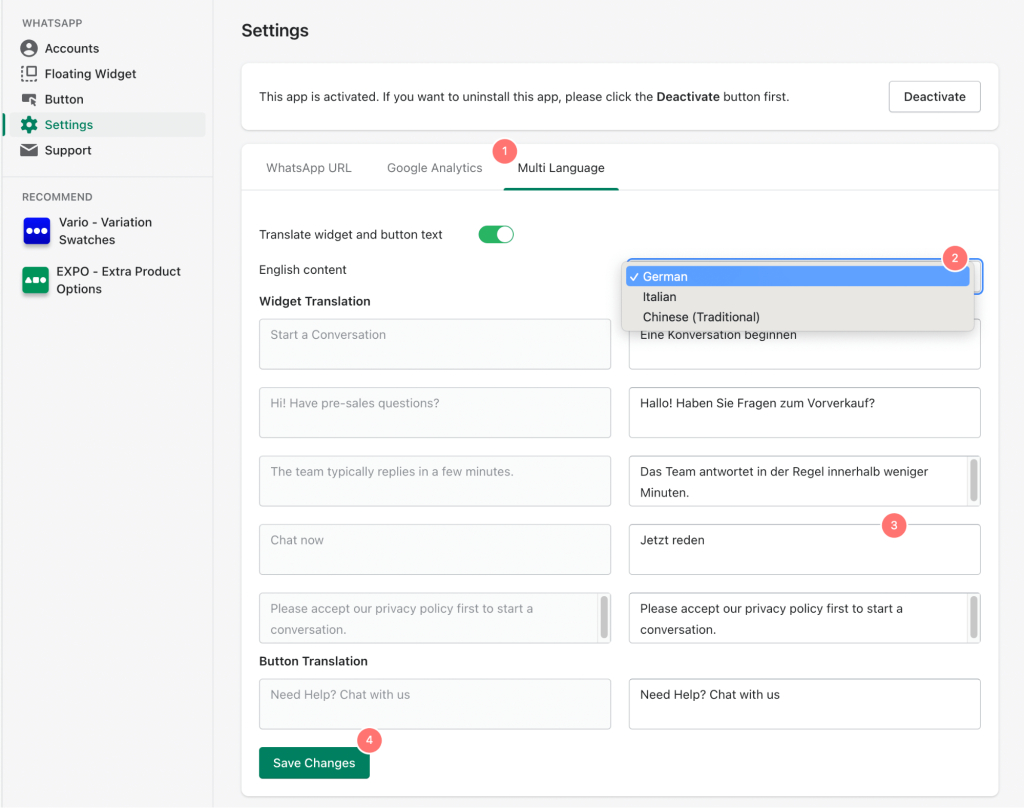
1. Enable translation: Go to Settings > Multi Language and enable Translate text.
2. Select language: For each language that you’ve published, you will see a dropdown list to choose one to start translating.
3. Translate: Enter your translation strings respectively.
4. Finish adding WhatsApp to Shopify!
Conclusion
Take your customer experience to the next level by customizing the look and feel of the WhatsApp Chat widget for your Shopify store with the five easy steps outlined in this tutorial! With WhatsApp Chat Widget by SeedGrow, you can create a seamless experience for your customers, ensuring they have a positive experience with your store. Embrace the power of this app and watch your customer satisfaction soar!